• The TUGBBS forums are completely free and open to the public and exist as the absolute best place for owners to get help and advice about their timeshares for more than 30 years!

    Join Tens of Thousands of other Owners just like you here to get any and all Timeshare questions answered 24 hours a day!
  • TUG started 31 years ago in October 1993 as a group of regular Timeshare owners just like you!

    Read about our 30th anniversary: Happy 31st Birthday TUG!
  • TUG has a YouTube Channel to produce weekly short informative videos on popular Timeshare topics!

    Free memberships for every 50 subscribers!

    Visit TUG on Youtube!
  • TUG has now saved timeshare owners more than $23,000,000 dollars just by finding us in time to rescind a new Timeshare purchase! A truly incredible milestone!

    Read more here: TUG saves owners more than $23 Million dollars
  • Sign up to get the TUG Newsletter for free!

    Tens of thousands of subscribing owners! A weekly recap of the best Timeshare resort reviews and the most popular topics discussed by owners!
  • Our official "end my sales presentation early" T-shirts are available again! Also come with the option for a free membership extension with purchase to offset the cost!

    All T-shirt options here!
  • A few of the most common links here on the forums for newbies and guests!

Picture of the Day (Dial-up internet users enter at own risk!)

Timeshare Von

TUG Review Crew: Expert
TUG Member
Joined
Mar 13, 2006
Messages
7,273
Reaction score
1,992
Location
Milwaukee, WI
Resorts Owned
After 40+ years of T/S ownership, I am no longer "an owner"
Sue, Not to pop your bubble, but I tilted that photo on purpose in Picasa editing. The original photo doesn't exphasize the road enough. All I could see was that big mountain.

The distant mountains were obscurd in the sky. I added contrast and played with highlights and color.

Robert


That's a really cool technique Robert. I was looking at that photo for at least a minute trying to figure out how you shot it! Thanks for helping me see it clearer :)
 

geoand

TUG Review Crew: Rookie
TUG Member
Joined
Jun 6, 2005
Messages
1,287
Reaction score
289
Location
Anacortes, WA
Kristin, beautiful shots of those birds. What lens were you using?
 

KristinB

TUG Review Crew: Veteran
TUG Lifetime Member
Joined
Jun 7, 2005
Messages
776
Reaction score
1
Location
Stafford, VA
Kristin, beautiful shots of those birds. What lens were you using?

Thanks, I took those with my Nikon D200 and my Nikon 70-300 VR lens. My hubby had originally suggested that I bring my Nikon 300mm f/2.8 lens (can you imagine? :eek:), but I wanted to have something I could handhold as well as carry around without too much trouble.
 

NEVacationer

newbie
Joined
Mar 24, 2008
Messages
41
Reaction score
0
Location
Washington DC
Family Vacation Pictures

Everyone seems to have planned their summer vacation and I am just getting started! I'm looking for inspiration because it is so hard to choose a destination, so would you all post a picture showing off your most recent summer trip?

As they say, a picture is worth 1,000 words, so lets see who can post the best picture! I'm hoping that seeing a few of your favorite places will help me make a decision.
 

lprstn

TUG Review Crew: Veteran
TUG Member
Joined
Sep 14, 2007
Messages
2,655
Reaction score
22
Our visit to Pompano Beach, FL

mateo_atbeach_beforesurprise.jpg

My little guy at the beach at Sea Gardens, Pompano Beach
 

lprstn

TUG Review Crew: Veteran
TUG Member
Joined
Sep 14, 2007
Messages
2,655
Reaction score
22
Surprise in come the waves

My little guy at the beach at Sea Gardens, Pompano Beach

Mateo_atbeach_surprise.jpg
 

DeniseM

Moderator
Joined
Jun 6, 2005
Messages
58,491
Reaction score
10,314
Location
Northern, CA
Resorts Owned
WKORV, WKV, SDO, 4-Kauai Beach Villas, Island Park Village (Yellowstone), Hyatt High Sierra, Dolphin's Cove (Anaheim) NEW: 2 Lawa'i Beach Resort!
We already have an on-going photo thread in the TUG Lounge, so I'm going to move these posts to that thread. Thanks!
 

swift

TUG Lifetime Member
Joined
Jun 6, 2005
Messages
2,037
Reaction score
12
A call for TUGBrian

Just going back through the thread. Hoping our Timeshare Guru has a nice trip planed this summer and bringing his camera. :D


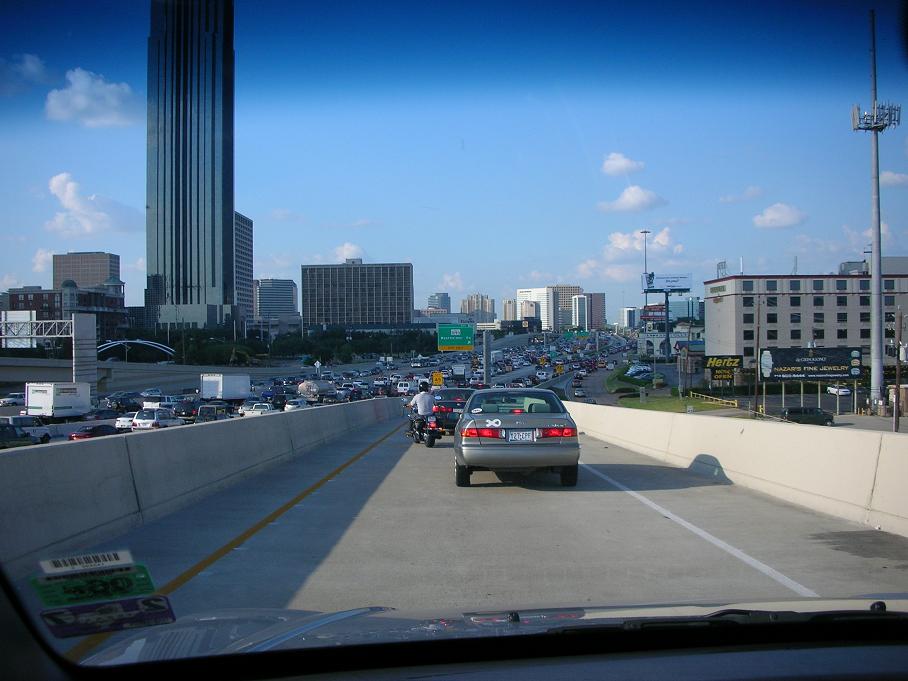
man...last trip I took that I got a decent photo of was a contracting gig in houston before I took over tug.

fantastic shot of traffic...I had never seen 14 lanes of dead stop traffic before!

houstontraffic.jpg


sorry its not a pretty vacation type pic =D
 

T_R_Oglodyte

TUG Lifetime Member
Joined
Jun 6, 2005
Messages
16,657
Reaction score
8,661
Location
Belly-View, WA
it's a photoshop plug-in that simulates "controlling depth of field in the camera by using a large aperture lens producing a narrow depth of field."

great if you don't have a dSLR and want this type of focus!

Many photoshop type programs have a similar feature now. Also any camera that has manual, aperture, or shutter speed priority settings can be used to create shallow depth of field. Since most digital cameras except the very cheapest ones have M-A-S options, you don't need a DSLR camera to work with depth of field.

++++++

A big limitation of the depth of field software tools is that you have to identify a specific oval or circle shape that is the area to remain in focus while the rest of the photo is blurred. If that oval contains background details, those details remain sharp and in focus instead of blurring as they would if the photo had been shot with a large aperture. For example, in the photo you selected the carved-wood duck and the candlestick holder in the background next to the lamp are in sharp focus. But the adjacent lamp, which is the same focal distance, is half in focus and half out of focus because the blurring selection passed through the middle of the lamp. There are some similar conditions at the base of the bowl.

Another way to do the same thing (and get some added photo enhancement benefits) is to make a feathered selection of the area you want blurred, then apply a blur to that selected area.

I had similar issues creating a suitable blurred area with this photo of my nephew, his wife, and their daughter.

100_7071.JPG


With the range of objects in the photo I couldn't use the blurring tool to get everything to come out right. The objects in the background directly behind the sofa are a particular problem. The snowman figure and the chimes naturally draw attention, but using the blurring tool I couldn't blur them without also including peoples heads in the blurred area. To get around that, I selected the areas I wanted to blur using the selection tool (including both the near field portions of the blanket close to my camera and the far field objects and wall behind the sofa). I then applied a blur to that selected area. I did some additional work on the photo to remove red eye and flash reflection, and adjust color balance and skin tones. Here's the final result:

100_7071.JPG


++++++++++++

When you do the selection technique it allows you to do some other manipulations of the background that can further minimize distracting photo elements.

In this photo of another one of my nephews I thought the greenish wall behind him made an unattractive background and I found my attention sometimes being drawn to the color clash and the foliage behind his head instead of to my nephew's face.

100_7086.JPG


So after selecting the background area, not only did I blur the background, but I changed the background to a less obtrusive and more harmonious tone.

100_7086.JPG
 
Last edited:

Brett

Guest
Joined
Jun 6, 2005
Messages
9,872
Reaction score
5,390
Location
Coastal Virginia
Many photoshop type programs have a similar feature now. Also any camera that has manual, aperture, or shutter speed priority settings can be used to create shallow depth of field. Since most digital cameras except the very cheapest ones have M-A-S options, you don't need a DSLR camera to work with depth of field.
A big limitation of the depth of field software tools is that you have to identify a specific oval or circle shape that is the area to remain in focus while the rest of the photo is blurred. If that oval contains background details, those details remain sharp and in focus instead of blurring as they would if the photo had been shot with a large aperture. For example, in the photo you selected the carved-wood duck and the candlestick holder in the background next to the lamp are in sharp focus. But the adjacent lamp, which is the same focal distance, is half in focus and half out of focus because the blurring selection passed through the middle of the lamp. There are some similar conditions at the base of the bowl.

Another way to do the same thing (and get some added photo enhancement benefits) is to make a feathered selection of the area you want blurred, then apply a blur to that selected area.
I had similar issues creating a suitable blurred area with this photo of my nephew, his wife, and their daughter.
With the range of objects in the photo I couldn't use the blurring tool to get everything to come out right. The objects in the background directly behind the sofa are a particular problem. The snowman figure and the chimes naturally draw attention, but using the blurring tool I couldn't blur them without also including peoples heads in the blurred area. To get around that, I selected the areas I wanted to blur using the selection tool (including both the near field portions of the blanket close to my camera and the far field objects and wall behind the sofa). I then applied a blur to that selected area. I did some additional work on the photo to remove red eye and flash reflection, and adjust color balance and skin tones. Here's the final result:
When you do the selection technique it allows you to do some other manipulations of the background that can further minimize distracting photo elements.
In this photo of another one of my nephews I thought the greenish wall behind him made an unattractive background and I found my attention sometimes being drawn to the color clash and the foliage behind his head instead of to my nephew's face.
So after selecting the background area, not only did I blur the background, but I changed the background to a less obtrusive and more harmonious tone.


right, I have a camera with those manual controls but I couldn't duplicate that narrow depth of field effect except with the add-on, I didn't follow up with the blur brush and using layers, etc. as I'm still at the learning stage with "post processing" and pictures. It is amazing how much you can change a picture, with just a little skill you can improve bad photos - but some are not so salvageable !
 

NEVacationer

newbie
Joined
Mar 24, 2008
Messages
41
Reaction score
0
Location
Washington DC
I'm still a novice with my new camera, but hopefully I'll get some crisp pictures of my family and I over the summer. The pics you all have up here are gorgeous!

Just fyi, if any of these photos are from Royal Holiday vacations they have a photo contest at http://www.royal-holidaycontest.com/photo.html and the top-rated picture submitter wins 7 nights at the park royal cozumel. The buffet is all I need at a place like that. :whoopie:
 

T_R_Oglodyte

TUG Lifetime Member
Joined
Jun 6, 2005
Messages
16,657
Reaction score
8,661
Location
Belly-View, WA
right, I have a camera with those manual controls but I couldn't duplicate that narrow depth of field effect except with the add-on, I didn't follow up with the blur brush and using layers, etc. as I'm still at the learning stage with "post processing" and pictures. It is amazing how much you can change a picture, with just a little skill you can improve bad photos - but some are not so salvageable !

Here's the easy way to do it.

  1. Duplicate the photo into a new layer. So now you have the photo on two identical layers. Rename the topmost layer to something such as "blurred".
  2. Make the "blurred" layer active, then Select=>All (from the dropdown menus or Ctl-A).
  3. Blur the entire layer. I suggest using the Gaussian blur tool - set the pixel blur to whatever setting gives you the amount of blur you want in the deepest part of the photo. At this point the entire photo will look blurred, but that's OK.
  4. With the blur layer still selected and entire layer selected, create a mask for the "blurred" layer. You can do this from the dropdown menu or by right clicking on the "blurred" layer in the layers palette. If given the option to Hide Selection" or "Show Selection", select "Hide Selection". A mask layer will now be added to the "Layers" palette on the right side of the image and it should be grouped with the "blurred" layer. The mask layer should be completely black, and the picture should now be completely unblurred. (That's because the black mask completely hides the blurred layer.)
  5. Make the bottom layer (your original unblurred photo) the active layer. Do this by clicking on the icon for that layer in the layers palette.
  6. Using the selection tools, make a selection of the areas that you want to appear blurred. (It may actually be easier to select the areas you don't want to blur, then invert the selection.)
  7. Make the mask the active layer by clicking on it in the layers palette. Now use the bulk fill tool (probably shows a paint bucket icon) to fill the selected area on the mask with white paint.
  8. Now you should see blurring only in the areas you selected to be blurred. Note that this corresponds to the areas on the mask that you just painted white. The areas where the mask is black will remain unblurred.
The nice part of this method is you can now go back and touch up your blurring by painting on the mask. For example, if you blurred an area that you shouldn't have, you can fix it simply by applying black paint on the mask over the area that you want to have unblurred. Or put white paint on the mask over areas that you do want blurred.

If there is an area that you want blurred, but without a full strength blur, paint on the mask with a gray color in that area. The darker the gray, the less the blurring. (If you're following this, black on the mask hides whatever is below the mask; white on the mask shows whatever is below the mask. Gray partially hides and partially shows, with darker grays hiding more of the layer, while lighter grays show more of the layer.)

I know this sounds complicated but after you do it a couple of times the work with layers becomes a snap. The most tedious part is making the selection
 
Last edited:

Makai Guy

Administrator
Joined
Jun 3, 2004
Messages
4,708
Reaction score
1,720
Location
Aiken, SC, USA
Resorts Owned
Spicebush (Hilton Head Island)
Just back from a two week Alaska cruise / land tour.

Resurrection River, right across the road from our lodge in Seward.

"Watch closely, Junior, this is how we catch fish .."
p1010242aok3.jpg

Thanks to ImageShack for Free Image Hosting
 
Last edited:

Brett

Guest
Joined
Jun 6, 2005
Messages
9,872
Reaction score
5,390
Location
Coastal Virginia
Here's the easy way to do it.

  1. Duplicate the photo into a new layer. So now you have the photo on two identical layers. Rename the topmost layer to something such as "blurred".
  2. Make the "blurred" layer active, then Select=>All (from the dropdown menus or Ctl-A).
  3. Blur the entire layer. I suggest using the Gaussian blur tool - set the pixel blur to whatever setting gives you the amount of blur you want in the deepest part of the photo. At this point the entire photo will look blurred, but that's OK.
  4. With the blur layer still selected and entire layer selected, create a mask for the "blurred" layer. You can do this from the dropdown menu or by right clicking on the "blurred" layer in the layers palette. If given the option to Hide Selection" or "Show Selection", select "Hide Selection". A mask layer will now be added to the "Layers" palette on the right side of the image and it should be grouped with the "blurred" layer. The mask layer should be completely black, and the picture should now be completely unblurred. (That's because the black mask completely hides the blurred layer.)
  5. Make the bottom layer (your original unblurred photo) the active layer. Do this by clicking on the icon for that layer in the layers palette.
  6. Using the selection tools, make a selection of the areas that you want to appear blurred. (It may actually be easier to select the areas you don't want to blur, then invert the selection.)
  7. Make the mask the active layer by clicking on it in the layers palette. Now use the bulk fill tool (probably shows a paint bucket icon) to fill the selected area on the mask with white paint.
  8. Now you should see blurring only in the areas you selected to be blurred. Note that this corresponds to the areas on the mask that you just painted white. The areas where the mask is black will remain unblurred.
The nice part of this method is you can now go back and touch up your blurring by painting on the mask. For example, if you blurred an area that you shouldn't have, you can fix it simply by applying black paint on the mask over the area that you want to have unblurred. Or put white paint on the mask over areas that you do want blurred.
If there is an area that you want blurred, but without a full strength blur, paint on the mask with a gray color in that area. The darker the gray, the less the blurring. (If you're following this, black on the mask hides whatever is below the mask; white on the mask shows whatever is below the mask. Gray partially hides and partially shows, with darker grays hiding more of the layer, while lighter grays show more of the layer.)
I know this sounds complicated but after you do it a couple of times the work with layers becomes a snap. The most tedious part is making the selection

OK, I'll copy and try that method but my skill with the mouse and delineating areas is not that great, (I like the quicker fixes where the software does the work!) .. like the plug-ins that produce effects like "ReDynaMix" (in the filters) that simulates "High Dynamic Range" http://www.mediachance.com/plugins/redynamix.html

here is one where I used the Redynamix PS plugin changing a pic of an abandoned beach house -


it seems to improve landscape and building pictures, sure it's an illusion but still fun to play around with
 

T_R_Oglodyte

TUG Lifetime Member
Joined
Jun 6, 2005
Messages
16,657
Reaction score
8,661
Location
Belly-View, WA
OK, I'll copy and try that method but my skill with the mouse and delineating areas is not that great, (I like the quicker fixes where the software does the work!)
No q8estion that requires some practice. But it's worth learning, because once you make good selections you can be even more precise in how you enhance your picture. Doing adjustments to the entire picture is like using machete - one size fits all. Whereas with selections you can be surgical. Is there a picture that you like the whole thing except that you wish the sky was bluer? (That's pretty common in my photos. If I expose for the scene the sky comes out too bright.) Select the sky and appl your darkening only to the sky.

I started out the same as you - adjusting the entire picture, and being frustrated at my ability to make selections. But if you stay at it you'll get better.

Your software should have a tool that makes selections based on various parameters, such as color, or brightness. That's a useful one and can save time using a mouse. Of if you use the manual selection tool, there should be an option that identifies and follows an edge as you move the mouse. That way you don't need to be so precise with your mouse movements. Also enlarge the picture. Go as high as 1000% if you need to. It's a lot easier to follow an edge when the photo is enlarged.

sure it's an illusion but still fun to play around with
It's all an illusion - starting with the photograph.

There's nothing sacred about the image that is produced by the camera. The joy is to produce an image that means something to us.

This photo (posted way, way, way back in this thread) is a favorite. I wadn't a picture that showed all of the bright colors in the public market, but the original was pretty mundane. With some adjustments in brightness, contrast, and saturation and applying an art media effect, I got a picture that was better than what I wanted when I took the picture:

100_4517.JPG
 

Makai Guy

Administrator
Joined
Jun 3, 2004
Messages
4,708
Reaction score
1,720
Location
Aiken, SC, USA
Resorts Owned
Spicebush (Hilton Head Island)
Doug,

That is just an awesome shot! :D How cool was that?

Tres cool indeed. We were just returning home from a Kenai Fjords boat tour and there were a bunch of people watching from the side of the road as we pulled into our lodge. The mama bear and cub were slowly making their way up the river, with the mama occasionally pouncing on a small fish (too early in the season for salmon, probably hooligan). Junior would watch intently for a while, but then would gambol off to play and splash, or chase a bird, or at one point, chase his almost-nonexistent tail. I probably took 50 pictures, knowing I could sort them out later. This is the best of the lot.

They weren't as close as that looked - this is cropped from a larger picture, taken at my max tele setting (about 500mm equiv on a 35mm camera). I'm quite impressed with the image stabilization my new camera provides, as the focus and detail look very good for a tele hand held shot. (Panasonic Lumix FZ18, 8megs, 18xZoom).
 

TUGBrian

Administrator
Joined
Mar 24, 2006
Messages
23,353
Reaction score
9,157
Location
Florida
wow...way cool teddy bears.

of course...if I came across that id leave a Brian shaped cartoon style hole in whatever wall/tree/mountain/etc was behind me.

Thats so awesome.
 

susieq

TUG Review Crew: Expert
TUG Member
Joined
Aug 8, 2005
Messages
1,303
Reaction score
370
Location
Massachusetts
Resorts Owned
Bay Voyage, Jamestown, RI

Ditto!!! Totally awesome!! :banana: :banana:
 

Brett

Guest
Joined
Jun 6, 2005
Messages
9,872
Reaction score
5,390
Location
Coastal Virginia
Is there a picture that you like the whole thing except that you wish the sky was bluer? (That's pretty common in my photos. If I expose for the scene the sky comes out too bright.) Select the sky and appl your darkening only to the sky.

yes, that's one of the things I wanted, along with that "fluid motion" effect, then I realized it required a tripod, lense filters, etc. to do it right. A lot of stuff can be done to a pic to improve it so I'm learning when I have time. One thing you get from the other forums dealing with photography is that the professional spends a lot time setting up a shot and in "post processing" (along with using expensive camera equipment!)
 
Top